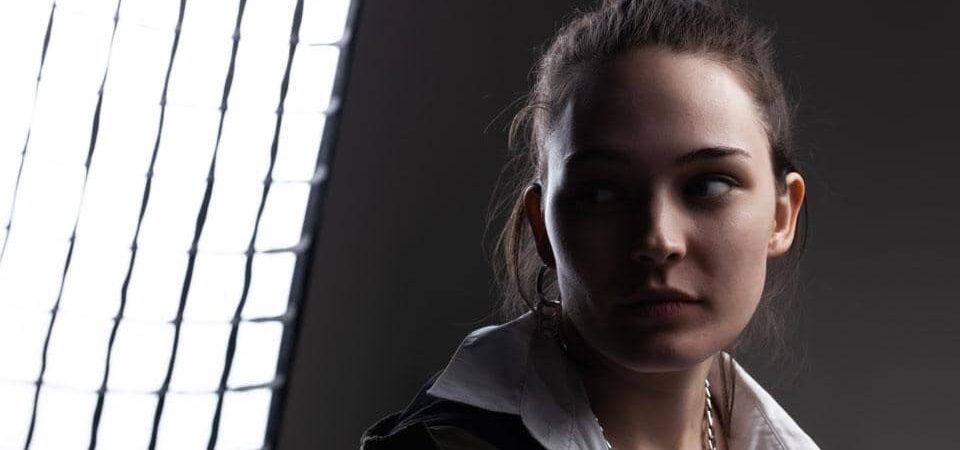
Softboxes are a tremendous aid to anyone who shoots portraits. They allow you to control the light temperature using diffusers, modifiers, and reflectors, whereas bare bulbs can’t do that since they produce more heat than cooling light.
What is a Softbox?
A softbox is a useful tool for portrait photographers because it creates a flattering light on the subject’s face.
It is similar to a regular light box in that it contains a grid of smaller lights, but the softbox has an open design that diffuses the light instead of reflecting it.
This makes it perfect for delicate portraits, as the soft light will not cause shadows or harsh highlights. Additionally, the open design prevents harsh shadows from appearing near the edge of the lightbox
Types of Softboxes
There are a few different types of softboxes out there and each has its own advantages and disadvantages.
The most common type is the DIY softbox, which you can make yourself with some simple materials. They’re not always the most reliable, but they’re easy to make and don’t cost a lot of money.
Another type of softbox is the studio light box. These boxes are specifically designed for use in studios, and they offer a number of advantages over DIY softboxes.
They’re more reliable, they produce better results, and they’re typically much more expensive than DIY softboxes.
The final type of softbox is the professional light box. These boxes are usually much more expensive than studio light boxes, but they offer a number of advantages that make them worth the investment.
They’re often very reliable, they produce great results, and they can be used in a variety of settings.
How to Choose the Right Size
When choosing a softbox, keep in mind the size and shape of your subject. Generally speaking, the larger the softbox, the more light it will diffuse.
Conversely, a smaller softbox will diffuse less light. A square or rectangular box will spread light out more than a round one.
The incredible flexibility of softbox lighting is one of its best features. Softbox lighting can be utilized for a variety of things, such as adding highlights to hair photos or giving the pictures a natural-looking glow.
You can purchase softbox lighting to produce a variety of effects, including bold shadows and glowing highlights.
Different Colors and Light Fixtures
Different colors and light fixtures can be used to create different moods in portraits. Blue light is known for its calming effect, whereas orange light can create a more stimulating or energizing atmosphere.
Red light is often used for corporate and event photography, as it has a powerful impact that can make people look energetic and engaged. variety is the key when it comes to creating the perfect mood for your portrait shots.
Picking the Right Light Source for a Variety of Subjects
There are a lot of factors to consider when choosing the right light source for your portrait photography. You might want to use natural light, an overhead light, or a studio light.
Each type of light has its own advantages and disadvantages. For example, natural light is often seen as the best option because it’s free and easy to get.
However, natural light can be difficult to control and can cause shadows if used incorrectly.
Overhead lights are great for larger groups or high-key portraits because they provide consistent exposure while allowing you to adjust the intensity.
Studio lights are ideal for product photography because they create a more controlled environment with more accurate lighting.
Different Lighting Situations
There are many different lighting situations you’ll encounter while photographing people, and each requires a slightly different approach to shooting.
One of the most common lighting situations is when you’re shooting someone in front of a plain white or light blue background.
To create this type of portrait, use a softbox to fill in any lack of light on the subject’s face. Place the softbox about two feet away from your subject and point it directly at their face.
Turn on the lights inside the box and adjust the focus until your image looks blurry but has a nice glow to it.
1. Choose the right size for your subject. A small softbox will give a softer light than a large one, while a large softbox will generate more intense light. Experiment until you find the size that works best for your subject and style of photography.
2. Position the softbox close to your subject. Place it approximately three feet from your subject and aim it towards their face. This way, you’ll get more flattering lighting without overexposing the image.
3. Use diffusion material to soften the light even further. Place pieces of diffusion material (such as brown paper bags) over the lights in your softbox to reduce glare and increase the depth of field.
4. Adjust the fill light settings on your camera to create shadows and highlights around your subject’s features. Use a low setting if you want deep shadows and a high setting if you’d like to highlight areas to stand out more prominently.


